
It is interesting to read in the news that over half of COVID-19 fatalities occur in folks who have gut problems. Learning how to improve one’s gut health may prove to be a useful tool in these times. I gave a workshop on fermented foods last year, and thought I would provide a copy of the handout I prepared for the class.
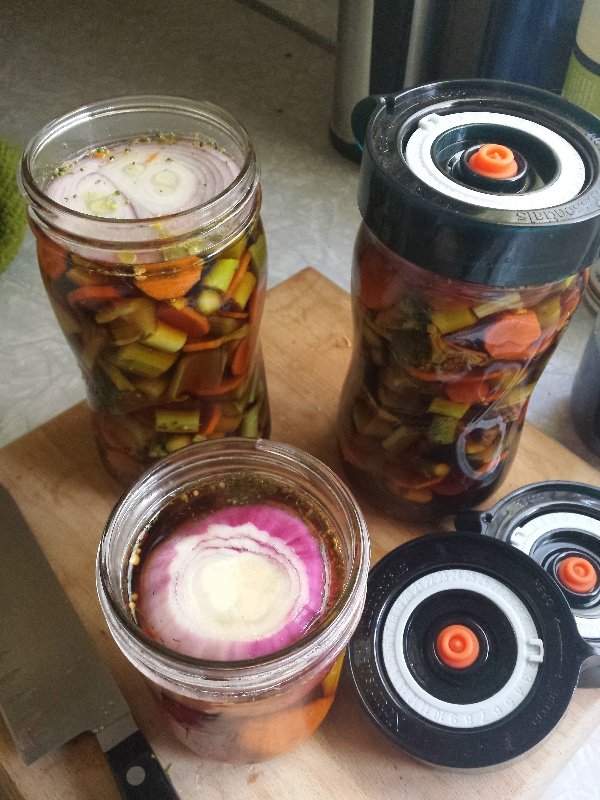
I found myself making up a couple of quarts of pickled asparagus, carrots, celery, peppers, onion and garlic this afternoon. Crunchy fermented veggies are so satisfying to munch on straight from the jar. Fermenting fresh vegetables also extends their shelf life…. So here you go …
Fermenting foods is an ancient practice which can increase the bioavailability of nutrients in food and can support optimal digestion. According to Ayurvedic Medicine, all disease begins and ends in the digestive system. Recent medical research has turned its interest toward microbes and their ecological relationships within the gut as key players in maintaining the health of the body.
It has been determined that toxins can accumulate in the body and circulate through the blood when digestion processes are not working properly. Incorporating naturally fermented foods into our diet may aid digestion and prevent toxic accumulation by returning the digestive tract to its homeostatic function.
Historically, fermentation has been used as a way of preserving foods and drinks long before the days of refrigeration. During the process of fermentation, microorganisms such as bacteria, yeast or fungi convert sugars and starch into alcohol or acids. The beneficial effects of fermented foods on health were unknown at that time, so the process was used to preserve foods, enhance shelf life, and improve flavor.
Fermentation preserves raw vegetables without heat, so it retains their vitamins, minerals, and enzymes. Natural fermentation has been found to preserve and enhance B and C vitamins in vegetables, make nutrients more readily available, can aid in digestion and may support the immune system…
Fermented foods became an important part of the diet in many cultures, and now has attracted scientific interest. Why? Because the microorganisms which contribute to the fermentation process have recently been associated with many health benefits. Lactic acid bacteria (LAB) have been highly studied. During fermentation, these bacteria synthesize vitamins and minerals and produce biologically active peptides with enzymes are also well known for their health benefits. Some of these peptides are known to lower blood pressure, while others are being studied for their anti-cancer and anti-microbial properties.
Naturally fermented foods are what you want to create to give your body a dose of healthy probiotics. Eating foods packed with good bacteria may boost gut health. DIY fermentation is the best way to go…..
HOW TO FERMENT VEGETABLES
Fermenting vegetables is a simple, inexpensive process that has been used for thousands of years. It is simple, easy, and requires little preparation or work. Most of the time involved is spent waiting. Home fermentation takes about a half-hour of chopping or shredding to produce a jar full of delicious crunchies that can feed you for weeks.
RECIPES – These recipes use a quick fermentation method without sugar, and leave the vegetables crisp and crunchy….
I. Spicy pickled vegetables
2 cups water
1 to 1-1/4 tablespoons sea salt
2 tablespoons apple cider vinegar (organic with the “mother”)
1 jalapeño sliced, or red pepper flakes
1 large carrot cut into 1/4-inch-thick rounds or diagonal slices
1 to 2 cups chopped cauliflower or small cauliflower florets
3 small stalks celery (use only small inner stalks from the heart), cut into 1-inch-long sticks
Sweet peppers
1 bay leaf
1 cabbage leaf.
Heat the water and stir in the sea salt until it dissolves completely. Set aside and add the vinegar when cool. You can be make this ahead of time and store in a sealed glass jar in a cool, place until ready to use.
Set a quart-size canning jar in the sink and fill it with boiling water to sterilize. Empty the jar and tightly pack the vegetables and bay leaf inside to within 1 to 2 inches from the top of the jar. Pour the brine over the vegetables to fill the jar to within 1 inch from the top. Wedge the cabbage leaf over the top of the vegetables and tuck it around the edges to hold the vegetables beneath the liquid.
Set jar on the counter and cover with a fermentation lid or use a standard lid which you loosen it a bit each day for the first few days, then every other day, to allow gasses to escape. Let the vegetables ferment for three to five days, depending on the indoor temperature. Vegetables will pickle faster in warmer climates. Make sure the vegetables stay packed beneath the liquid and add salted water (2 teaspoons sea salt dissolved in 1 cup warm water) as needed.
Check the taste after a couple of days using a clean fork. When the vegetables are fermented to your liking, seal the jar with a regular lid and refrigerate. Vegetables will continue to slowly pickle in the refrigerator. They will keep for about one month. Taste for saltiness before serving and, if desired, rinse gently to remove excess salt.
II. Fermented Cinnamon Apples (Yield: 2 quarts)
3 medium organic apples (chose apples on the sweeter side like Gala or Honey-crisp)
2-4 cinnamon sticks, crushed or 1 teaspoon powder.
1 lemon, juice & zest
4 T. sea salt
7-8 c. water
Combine the cinnamon, lemon juice, zest, sea salt, and filtered water in a medium pot. Heat over medium heat until barely simmering and salt is dissolved. Remove from heat and cover. Let steep and cool 30 minutes.
Wash apples well and slice the tops off 2 of the apples for packing the jars. Quarter the apples and slice very thinly. Pack them tightly into two sterilized quart jars. Press down gently.
Fill the jars with the salty water and cinnamon mixture. Place a reserved apple top in each other jars to submerge the slices in the liquid. Cover with a paper coffee filter or cheesecloth. Leave at room temperature for 5-7 days, testing around 4 days to gauge how sour it is. The longer it’s left at room temperature, the more sour (and less sweet) it will be. The fermented apples will keep for 3-6 months in the refrigerator.
III. Ginger Kombucha (Makes 1 gallon)
3 ½ quarts of water
½ to 1 cup white sugar
4 bags black tea (or 1 tablespoon loose tea)
4 bags green tea (or 1 tablespoon loose tea)
2 cups pre-made unflavored kombucha (from your last homemade batch or store-bought)
1 scoby per fermentation jar
2- to 3-inch piece fresh ginger (see Recipe Note)
Six 16-oz glass bottles with plastic lids, swing-top bottles, or clean soda bottles.
Bring 2 quarts of water to a boil. Remove from heat and stir in the sugar to dissolve. Drop in the tea and allow it to steep for ½ hour at least or until the water begins to cool. Add the remaining 1 ½ quarts of water to the batch and stir thoroughly. Remove the tea bags or strain out the loose tea. Stir in the pre-made organic kombucha which inoculates the batch.
Pour the mixture into a 1-gallon glass jar and if you have one, gently slide a SCOBY on top with clean hands. Cover the mouth of the jar with a few layers of cheesecloth or paper towels secured with a rubber band.
Keep the kombucha at room temperature, out of direct sunlight, and where it won’t get jostled. Ferment for 7 to 10 days, checking the kombucha and the scoby periodically. Do not disturb.
After 7 days, begin tasting the kombucha daily by pouring a little out of the jar and into a cup. When it reaches a balance of sweetness and tartness that is pleasant to you, the kombucha is ready to bottle. By now, a SCOBY should be floating in the fermented brew… With clean hands, gently lift it out of the kombucha and set it on a clean plate. Cover to keep it moist. Measure out 2 cups of the tea and set it aside for the next batch.
Peel and slice your ginger allowing for 1 teaspoon of ginger per bottle. Sterilize your jars by filling them with boiling water. Let them sit for 5 minutes, then empty them. Place your fresh ginger in the jars, and pour the fermented kombucha into the bottles using a small funnel. Fill them up to the “shoulder” of the jar leaving room for further carbonation and gas escape. Store at room-temperature out of direct sunlight and allow 1 to 3 days for the kombucha to carbonate. If you bottled in plastic bottles, the kombucha is carbonated when the bottles are rock-solid; if you bottled in glass, intermittently open one of the bottles to check the carbonation… listen for the “fizz” sound of gas escaping.
Once carbonated, refrigerate the kombucha for at least 4 hours to chill. The kombucha will keep in the refrigerator for several weeks. If desired, strain the kombucha as you serve it to catch any bits of ginger pulp. Enjoy!
